
This is the first pedal to get real paint, even before the talons, kot and eternity. I was worried about messing it up so I put tape ofer the entire enclosure. I drew and painted on the tape and put it together. It looked nice. I posted on reddit and they told me to just go for it. I am really glad I did.
Concept Art
I got the idea for the artwork on this pedal from searching pharaoh vector on google images. I came across one that was very like this image and really liked it. I wanted to do a skull face and find that references make drawing easier. I had really never done anything like this before.
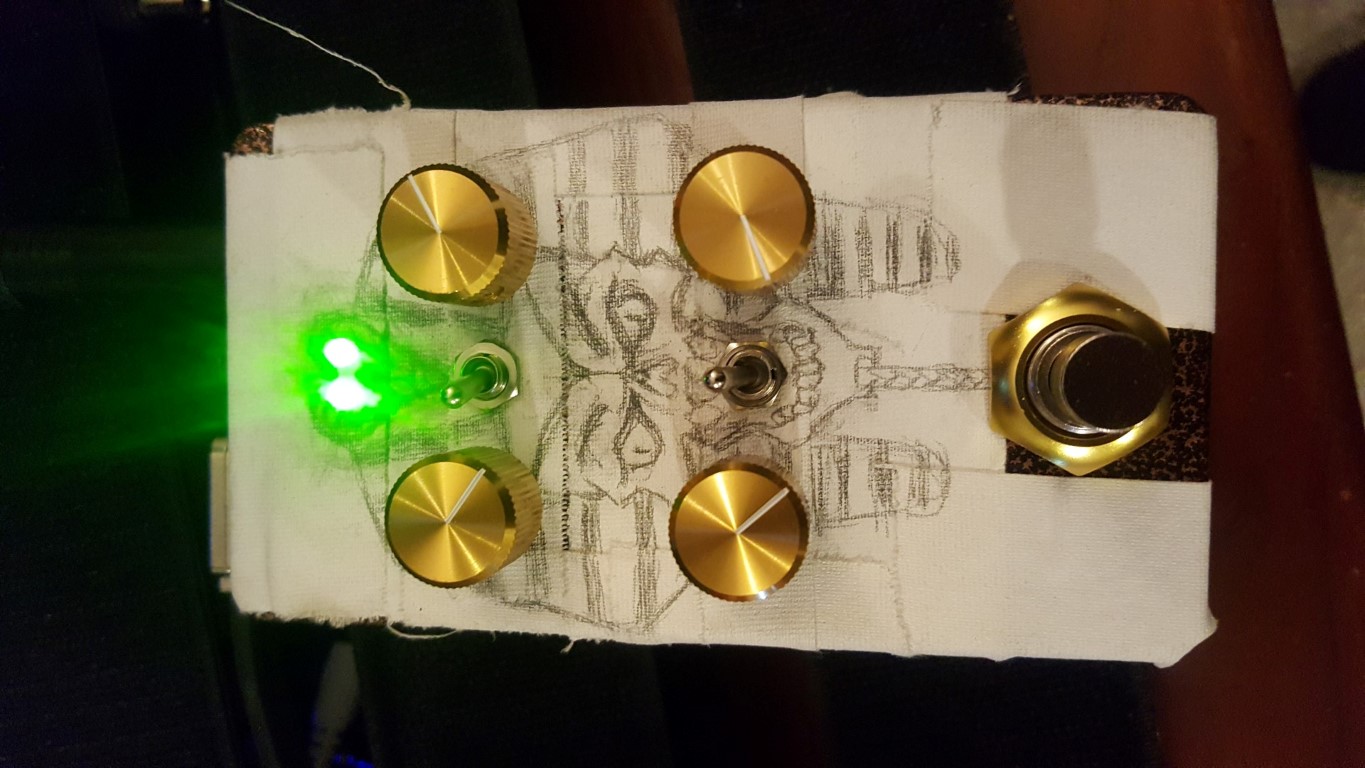
Because of that I was reloctant to just start painting on the pedal, and the copper hammer enclosure does not let me do a pencil outline first. Because this was my first time really trying to draw something I decided to cover the pedal with gaffer tape, and draw on that. Once I had my sketch completed I poked holes through the tape and put the pedal back together to see how I liked the way it looked.
Since I was satisfied with the sketch and had some acrylic paint pens on hand, I decided to take the pedal apart and color in the tape to really get an idea of what it looked like. I made a post to reddit with the tape pictures to see what people thought. I am really glad they gave me the encouragement to just go ahead and paint the pedals. Sometimes it just takes that little push from others to get you going on a new adventure.
Painting the Enclosure
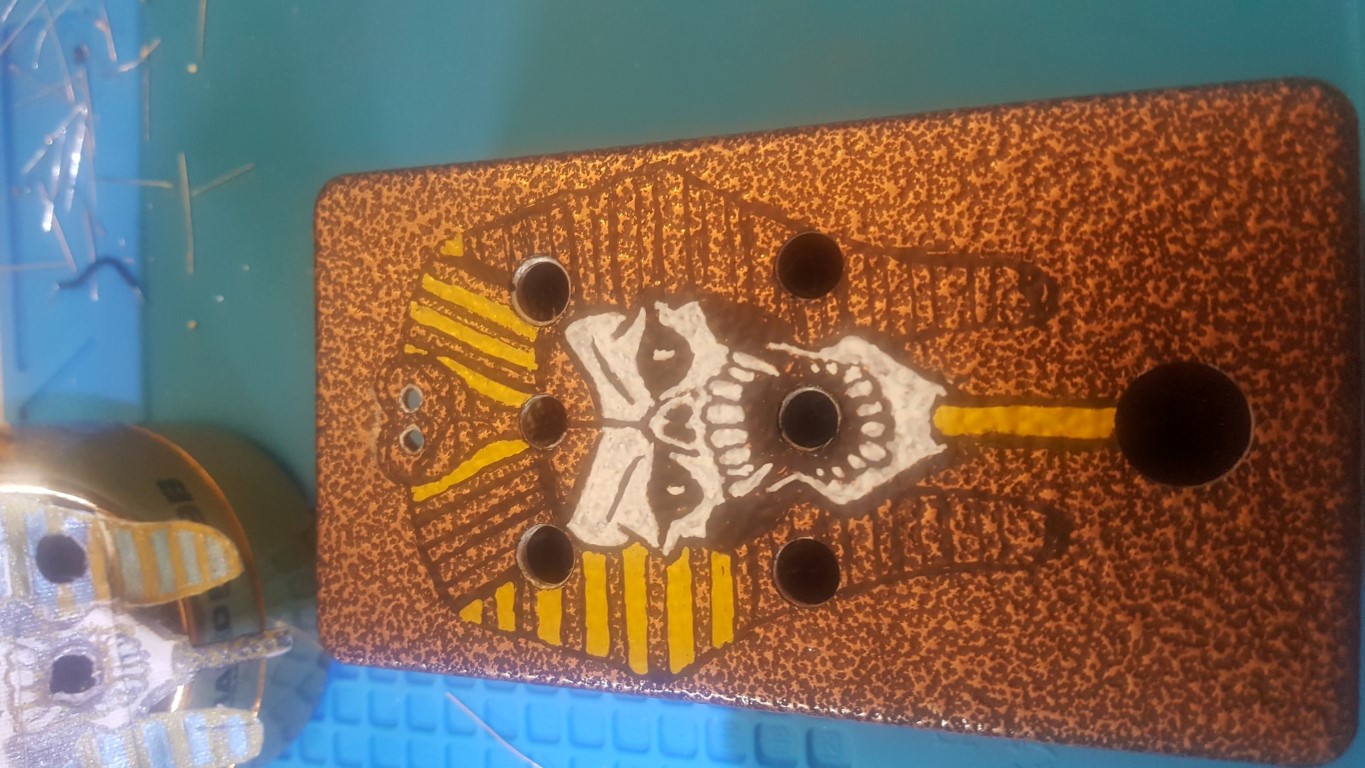
So I took several peoples advise and went ahead and painted on the enclosure. I made another reddit post when it was complete.
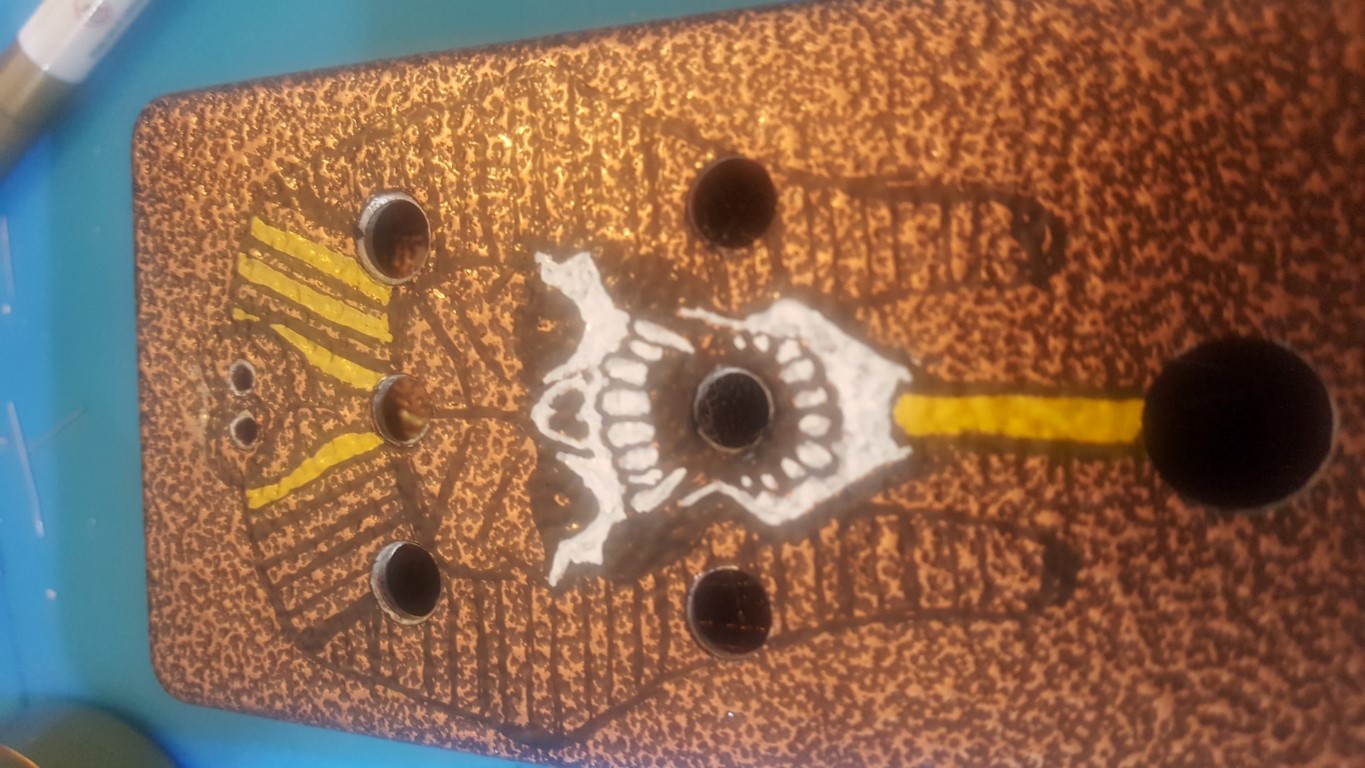
- I finally decided to start drawing on the enclosure itself. I used acrylic paint pens by artistro from amazon.
- Started Coloring. This is nerve wracking with shaky hands.
- Skull almost done.
- Hard to put detail into the snake.
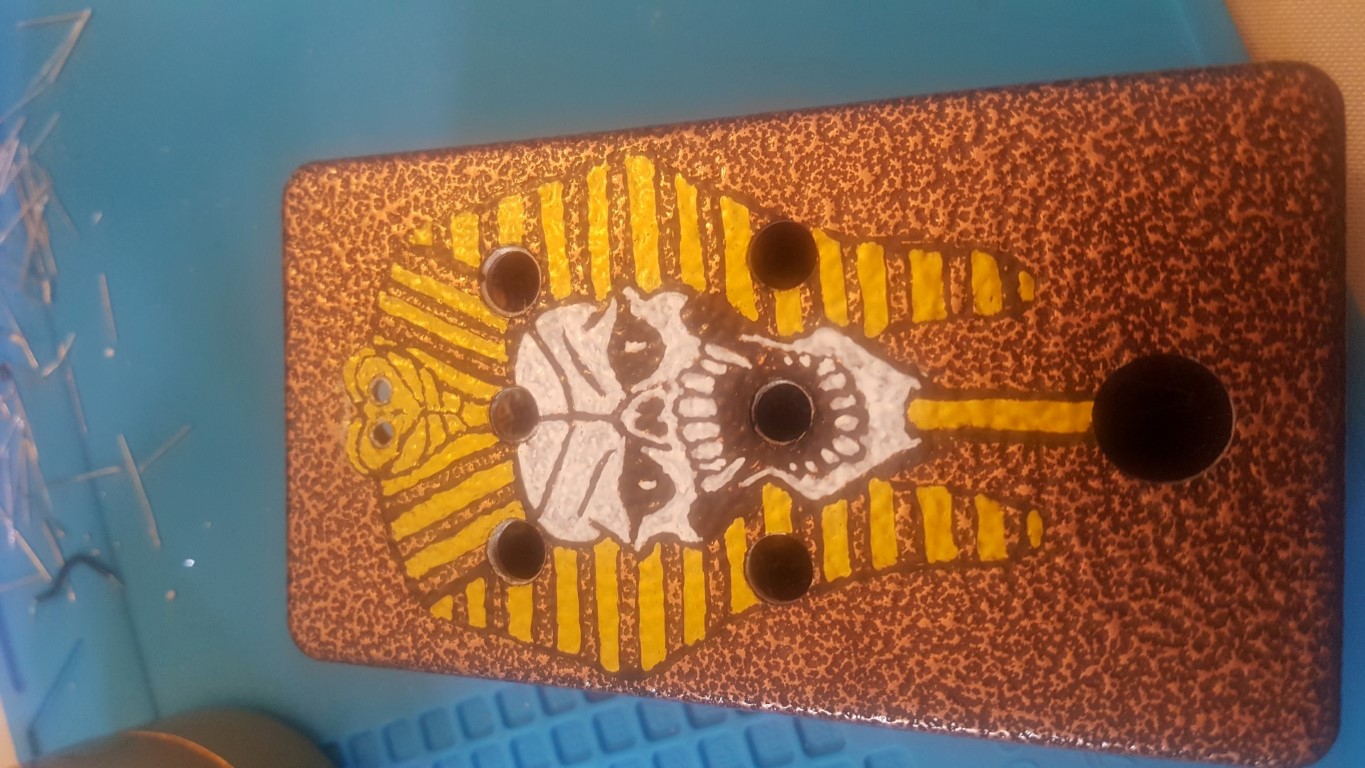
- I thought I was done with the coloring at this point. But in the final images you can see that I re-outlined almost everything.

Finishing
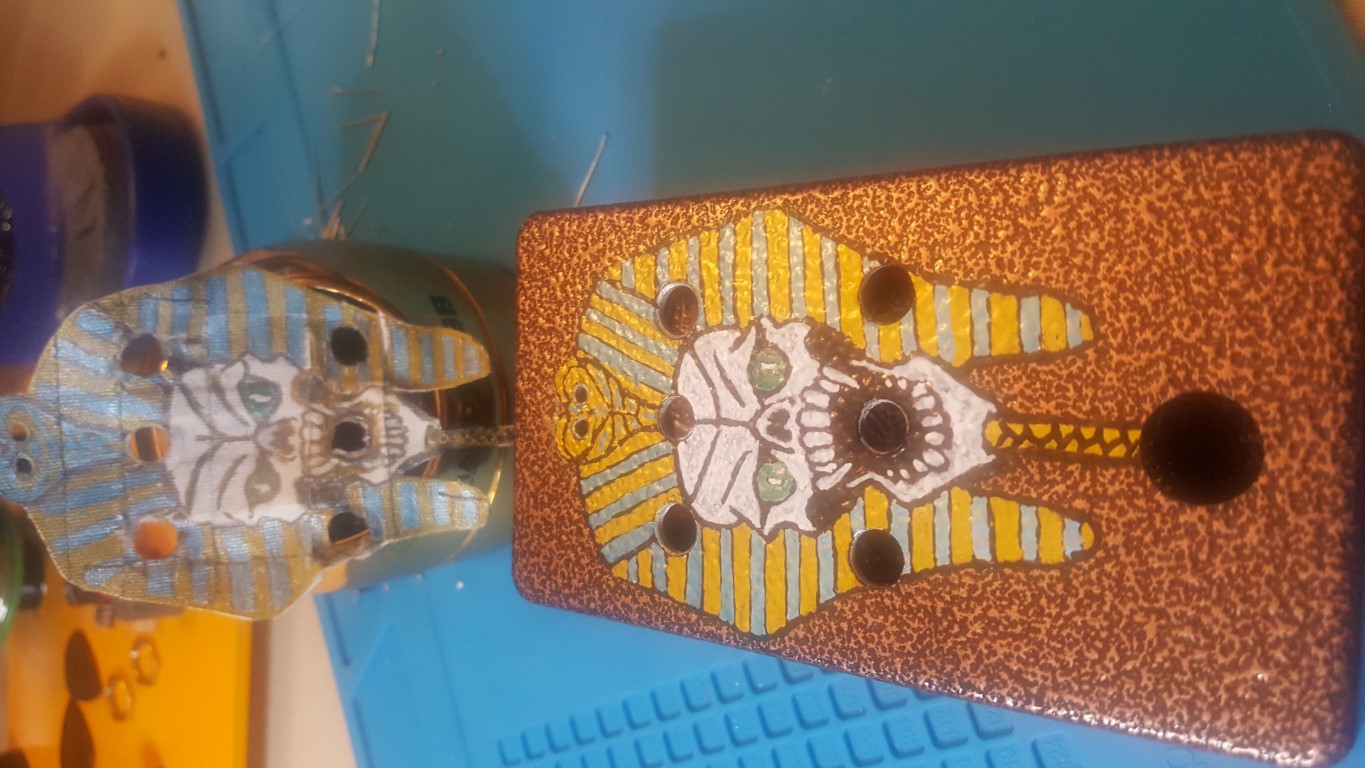
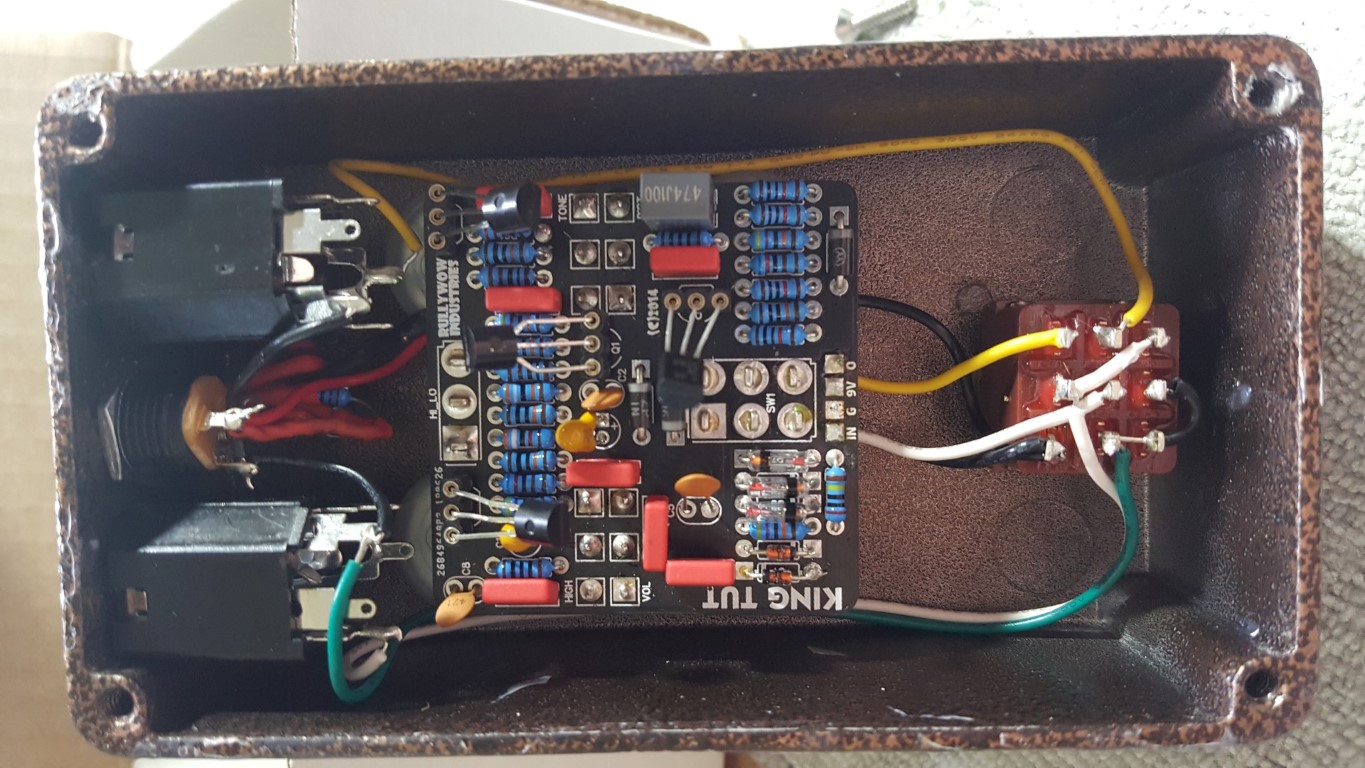
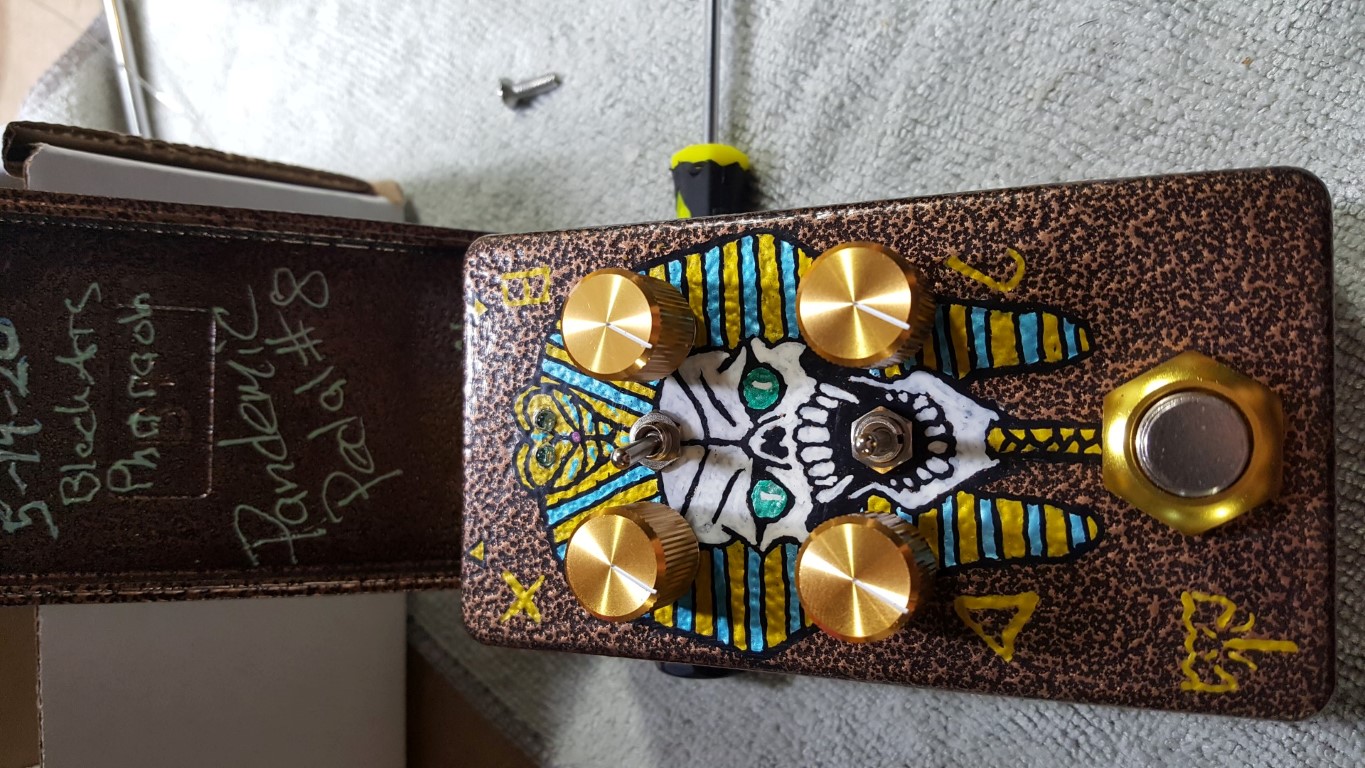
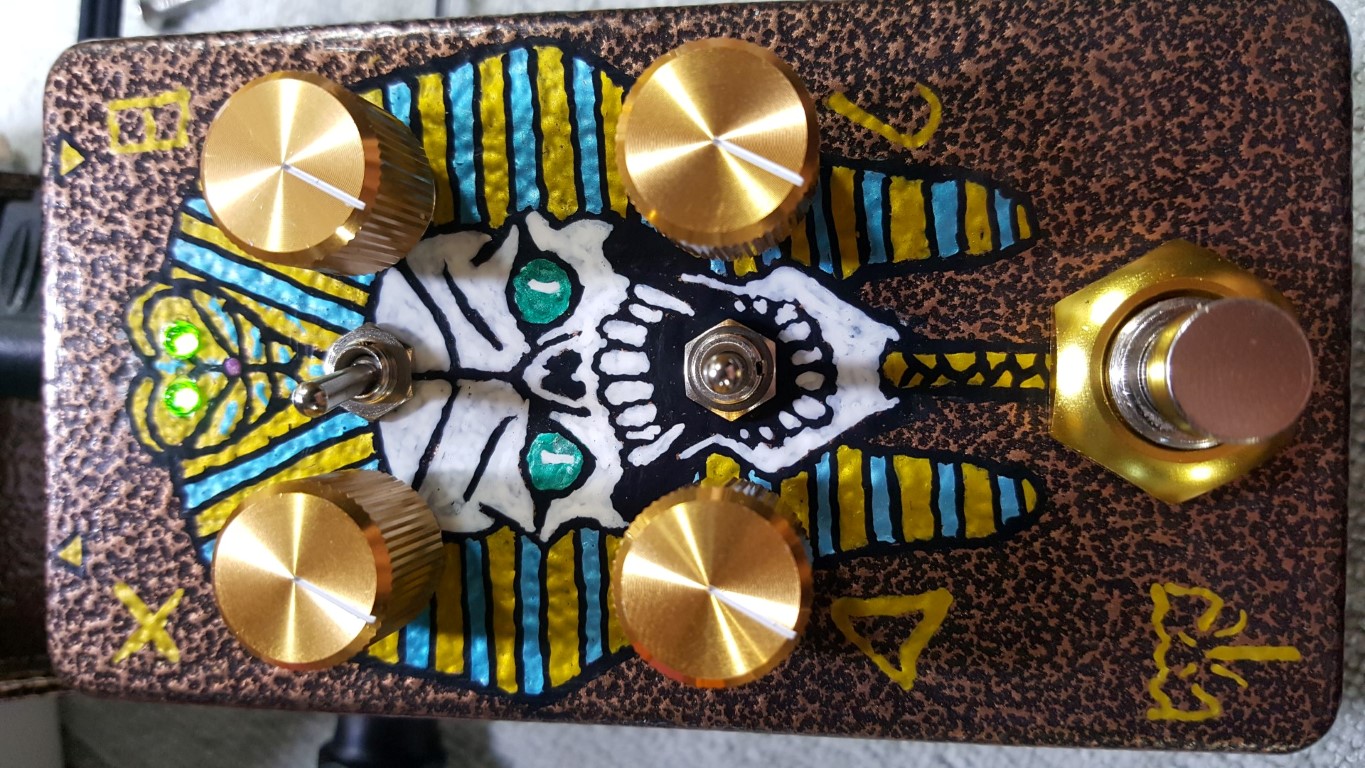
The first image below is the obligatory gut shot. I think I am going to cut the leads on the transistors to make it look a little cleaner.
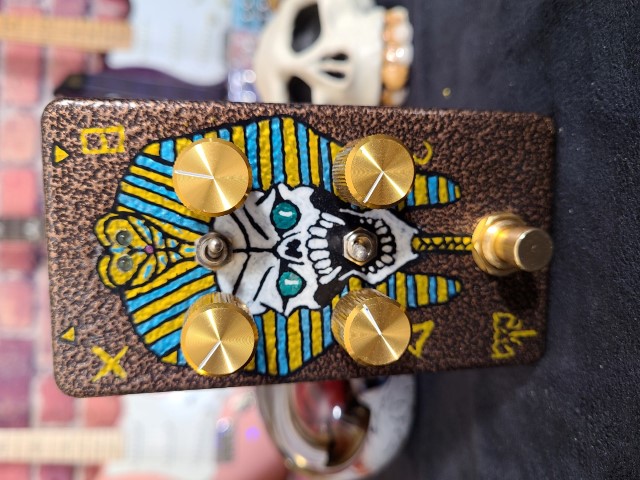
The next two are with it all done and assembled. I am glad I outlined things again. It helps define the shapes more. As you can see I outline the in and out arrows in black. I think I should have done the lettering as well. I used the Phoenician alphabet from wikipedia to indicate the controls.
| Knob Left | Switches | Knob Right |
|---|---|---|
| (T)one | Hi/Lo | (H)igh |
| (D)rive | Clip | (L)evel (Since there is no V for Volume) |
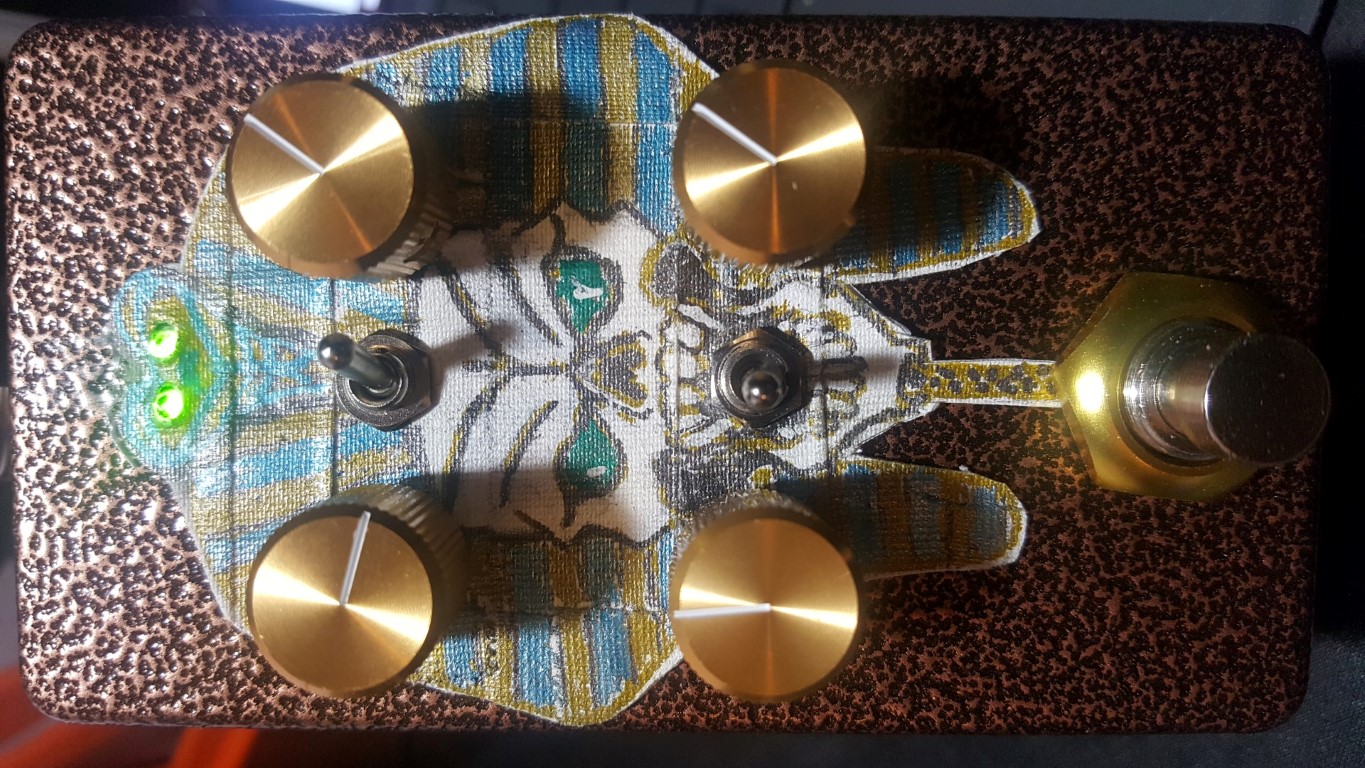
The third image shows the pedal with the indicator lights on.
Final Thoughts
Though not designed for top mounted jack I am trying to get some consistency in the pedals I build. I used the extra space for the dual LEDs. The knobs do feel a little low in the enclosure. I still need to put the proper transistors in it. The build doc calls for 3 - 2n5089s. I have them on order from smallbear but have not yet received my order. I saw that the 2n5088 I had on hand can be used as a sub so that is what is in there now. For now it is finished and I am going to see what kinds of sounds I can get out of it.
Note: [Feb. 14, 2021] I really need to open this back up and check though I think they are changed now.
The pedal has a satin finish as I was following the finishing from planetz. I think in the future I am just going to clear coat a few times and then wax. I liked that look better. But this is a learning process. Hope you enjoy.
Updates
Note: After finishing the pedal I found gold switches at LoveMySwitches and decided I would upgrade the pedal to use these. I made a video of the process. I hope this is informative.
Controls
- HI/LO Switch: Lo for more headroom/less clipping, Hi for less headroom/more clipping
- Fuzz
- Tone: full range tone control
- High: to replenish highs cut by the tone control
- Si/Ge Switch: Si for raspy distorted sound, asymmetric Ge for a more warm tubey old school sound
- Volume:
Build Gallery#

